How To Remove Old Car Window Tint
Are you looking for a way to remove old car window tint without the hassle and frustration? If so, then this article is here to help. With the right tips and techniques, getting rid of that pesky-tinted film can be surprisingly easy.
In light of this, we will explore some key methods to make sure your vehicle looks brand new again in no time. Read on to discover how to remove old car window tints with ease!
Gather The Necessary Tools
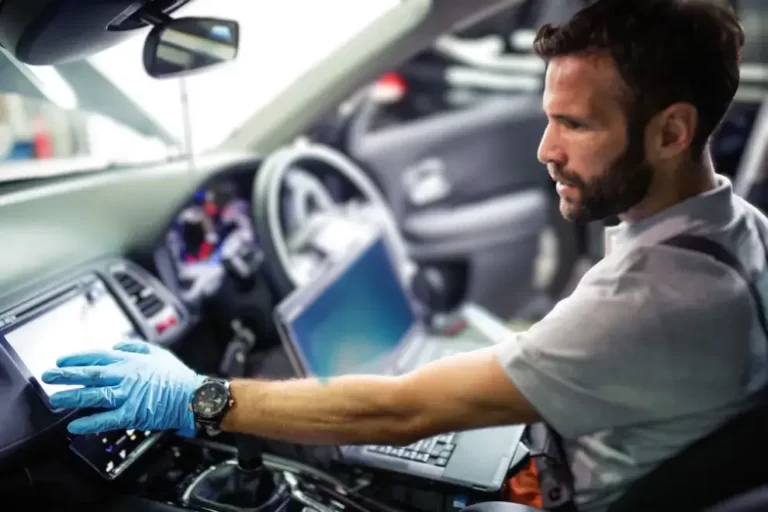
Taking the necessary safety precautions while attempting this task is essential to avoid any unwanted damage or injury. Gather all the required materials, such as razors, heat sources (hair dryer/heat gun/steamer), razor blades, and glass cleaner.
Heat must be applied in order to soften up the adhesive enough for it to come off without leaving residue on the windows. Start with a hair dryer or heat gun if available, and use a steamer when needed.
Move around each window evenly so that no parts are left out. Ensure not to overdo it- overly hot temperatures could lead to windows cracking.
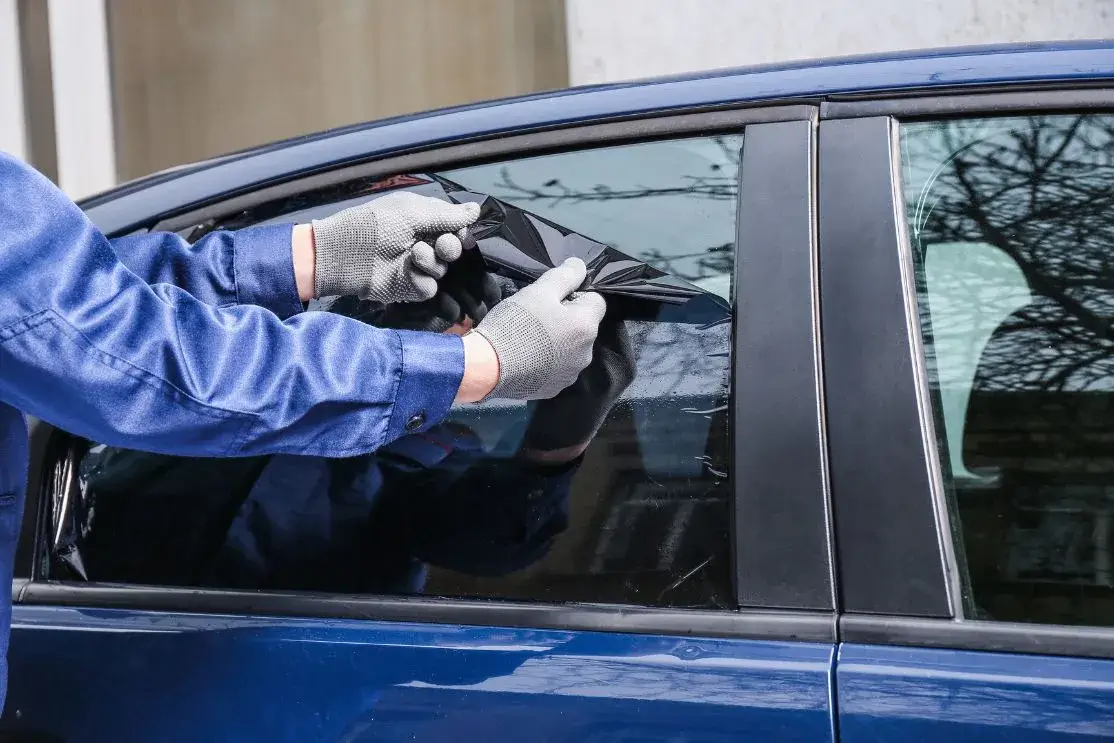
Once the adhesive has softened from heat exposure, use plastic razor blades or scrapers explicitly designed for removing window tints to peel away the film from the top corner down carefully and then proceed lengthwise until there’s nothing left behind except clean windows.
Clean the remaining pieces of adhesive buildup with glass cleaner before proceeding further to complete the job at hand.
Prepare The Window And Surrounding Areas
To begin with, it is important to thoroughly prepare the window and its surrounding area before attempting to remove old car window tint. First, any debris or dirt must be removed from the window’s interior and exterior. Cleaning off any remaining adhesive residue not previously removed when a new tint film was applied may also be necessary. Furthermore, cleaning tips such as using an ammonia-based glass cleaner can help increase clarity and provide better visibility during removal.
Secondly, protecting surfaces around the window should always take priority. This includes items like trim pieces, plastic fittings, dashboard components, and other materials near the edges of the windows. To do this effectively, laying newspaper or protective cloths over them to avoid staining these areas due to overspray from chemicals used in removing tints is recommended. Additionally, wearing safety goggles and gloves is essential for avoiding irritating fumes and potential skin damage caused by certain solvents, often used for tint removal.
Finally, suppose you are working on more than one window at once. In that case, it is advised that each successive step follows shortly after the completion of the previous steps so as not to let residue dry up quickly; doing this will ensure maximum efficiency while reducing time spent on laborious tasks such as scraping away dried-up glue stuck-on bits of the film still present on your windows’ surface.
Apply The Tint Remover
The process of removing old car window tint can often seem daunting. Knowing the proper steps to take and having a plan in place is essential for achieving safe and effective results. Here, we’ll provide tips on adequately removing your vehicle’s window tint so you can achieve optimal results with minimal effort.
To begin the tint removal process, selecting the correct product for the job is crucial. Many automotive stores carry specialized glass cleaners designed specifically for removing window tints; however, household items like dish soap or rubbing alcohol have also been known to work. Whichever product you choose, make sure you read any instructions carefully before use.
Once you’ve selected a suitable cleaner, spray it liberally onto the window film and wait about 10-15 minutes for it to set in before attempting to peel off the tint. This allows the liquid solution to break down any adhesive residue while holding the film firmly in place.
It also helps avoid any potential scratches from using too much force while scraping away at stubborn bits of glue.
Remove The Old Tint
Heat treatment is one of the most prevalent methods for removing old car window tints. This approach necessitates applying indirect heat to weaken the adhesive bonding of the film to the glass on your vehicle’s windows. Heat guns or steaming devices are commonly employed in this technique.
Once sufficiently heated, you should be able to remove any lingering pieces of tint from your car’s windows with minimal effort.
Alternatively, steam cleaning may serve as an efficient means of loosening adhesives binding tint films to car windows. The elevated temperature generated by steam will soften the glue, making it more straightforward to remove the film from your vehicle’s windows neatly and promptly.
You only require equipment such as a handheld garment steamer or a similar device, patience, and steady hands when managing hot objects during this procedure.
Safety precautions must always be considered when attempting either of these methods to remove old car window tints since they involve working simultaneously with both electrical items and potentially hot surfaces.
You should wear protective gear like goggles and gloves while performing this task to shield yourself from potential harm.
Clean Up The Window
The initial step in removing old car window tint is to ensure the glass surface is meticulously cleaned. The subsequent step involves using a razor blade to scrape off the tint film from the window cautiously.
It is crucial to note that extreme care should be taken while using the razor blade, as it may cause the glass to be scratched. Once the tint film has been removed, it is recommended to use a window cleaning solution to clean the glass surface further.
Removing Tint Film
Extracting tint film from car windows can be an uphill task. Still, when executed correctly, it can be a gratifying experience. To accomplish the task correctly, one should invest in a reliable heat gun and take all necessary safety precautions.
Heat gunning is considered the most effective method for removing old window tints as it will help dissolve adhesive backing without causing damage to your vehicle’s glass. Keeping the nozzle moving while heating the area is important, preventing burning through the film itself.
When finished, ensure both sides of each window are cleaned with a damp cloth or paper towel before applying new tinting film or leaving them unadorned. Overall, by adhering to these steps and taking all necessary precautions, your car windows will be free of any undesired tint and appear their best!
Cleaning Glass Surfaces
Eliminating tint film from car windows is the initial step in maintaining your vehicle’s appearance. Now that you have a clean slate, it’s time to consider how to appropriately store any leftover window tinting film and prevent damage or peeling during storage. Storing tint correctly will help extend its lifespan and save money on expenses related to replacing it in the future.
Luckily, you only need basic materials like cardboard boxes, wax paper or plastic sheeting, and tape to secure it safely. By taking these extra steps before storing your tint films, you can ensure they are ready to be reused whenever necessary without issue.
In addition to storing your window tints correctly, it is also vital to keep surfaces clean when applying new films. This should include regular dusting and cleaning of both sides of each glass pane to prevent any unwanted residue once the films adhere.
A damp cloth or microfiber towel can then be used for wiping off excess liquid or dirt particles that may still linger after drying the surface entirely. Addressing small details like this can
Apply New Window Tint (Optional)
Applying new window tint can be an exciting project for car owners. It involves selecting the appropriate type of tint and ensuring that it is applied correctly to achieve the desired outcome. To guarantee a smooth process, there are some crucial steps to follow before applying new window tint.
Firstly, you have to select the correct type of window tint from various available options today. Different tints provide varying benefits, such as UV protection, privacy, or heat reduction inside your vehicle. Consider factors like durability and warranty when making your decision.
Secondly, prepare the surface where you will apply the window tinting film by cleaning it thoroughly with glass cleaner and wiping off any dust particles using a lint-free cloth. This step ensures that no dirt gets trapped between the film and glass, which can cause bubbling or peeling later on.
Thirdly, appropriate application techniques must be followed to achieve optimal results:
- Cut the film slightly larger than needed for easy installation
- Use a squeegee to remove air bubbles during installation
- Trim away any excess material along edges after installation
- Let it cure for up to 5 days before rolling down the windows
By following these straightforward steps, you can ensure your car’s windows are properly fitted with high-quality window tint, making them look fantastic and last longer!
Conclusion
Removing old car window tints is manageable when the correct tools and techniques are employed. The process involves applying a specialized tint remover, which breaks down the adhesive, allowing you to remove the window tint safely with minimal effort. Once all the old window tint has been successfully eliminated, cleaning up any residue before applying the new window tint (if desired) is essential.
It’s worth noting that some states may require additional steps or materials for legally removing car window tints. Researching local laws is always recommended before attempting this job yourself.
Frequently Asked Questions
How to remove old car window tint?
There are several ways to remove old car window tint. Still, the most effective method involves using a heat gun or steamer to loosen the adhesive and then carefully peeling the tint away from the window. Work slowly and carefully to avoid damaging the glass or leaving glue residue behind.
What is the best way to remove window tint?
The best way to remove window tint depends on the type of tint and how it was applied. In most cases, using a heat gun or steamer to loosen the adhesive and then peeling the tint away is the most effective method. However, if the tint is particularly stubborn, you may need to use an ammonia solution or other adhesive remover to get it off.
How do I remove window tint from my car without damaging the glass?
Working slowly and carefully removes window tints from your car without damaging the glass is essential. Start using a heat gun or steamer to loosen the adhesive, then use a scraper or razor blade to peel the tint away from the glass carefully. Be sure to use plenty of soapy water to lubricate the surface and prevent scratching.
What is the best method for removing window tint from cars?
The best method for removing window tint from cars involves using a heat gun or steamer to loosen the adhesive, then carefully peeling the tint away from the window. Be sure to work slowly and carefully, using soapy water to lubricate the surface and prevent scratching.
How do I remove window tint glue residue from my car?
You can use an adhesive remover or a solution of ammonia and water to remove window tint glue residue from your car. Apply the solution to the affected area and let it sit for several minutes, then use a scraper or razor blade to carefully scrape away the glue residue.
Can I use a hair dryer to remove window tint?
While a hairdryer can help remove window tint, it is less effective than a heat gun or steamer. The heat generated by a hairdryer may not be strong enough to loosen the adhesive, making it more difficult to peel the tint away.
What is the easiest and most effective way to remove old window tints from your car?
The easiest and most effective way to remove old window tint from your car is to use a heat gun or steamer to loosen the adhesive, then carefully peel the tint away from the window. Be sure to work slowly and carefully, using soapy water to lubricate the surface and prevent scratching. Suppose there is any glue residue left behind. In that case, you can use an adhesive remover or ammonia solution to get it off.