How To Remove Car Wrap
Car wrapping is a popular method for customizing cars with unique designs and colours. It requires precision, skill, and suitable materials to ensure that it looks perfect when finished. This article will provide an overview of how to safely remove car wrap from a vehicle to change its appearance or restore the original colour.
Detailed instructions on step-by-step removal processes and helpful tips for best results will be provided. So get ready to give your ride a new look!
Preparing Your Vehicle For Wrapping Removal
Removing a car wrap can be an intimidating process. Still, this task can be completed relatively quickly with the proper preparation and tools. The first step of the removal process is preparing your vehicle for wrapping removal.
Before beginning any work on a vehicle, ensuring all surfaces are clean is essential. This means removing dirt, dust, and other debris from the paintwork to avoid damaging the finish while working on it. Cleaning off these particles will also help protect both you and your car during the entire wrapping process.
A mild detergent solution with soft microfibre towels or sponges is an excellent way to start this cleaning procedure.
Once finished cleaning, protect your paintwork by applying masking tape along areas such as door handles, roof rails, and window seals where the vinyl may come into contact with them when peeled away from the surface.
Taking extra precautions like these should ensure that no damage comes to your vehicle throughout its transformation back to its original condition once the wrap has been removed.
Choosing The Right Removal Tools
Heat guns can safely and effectively heat the adhesive on a car wrap and make removing it easier. Razor blades and plastic scrapers should also be used carefully when removing a car wrap. They can help remove pieces of adhesive still left on the car.
Adhesive remover should also be used to help break down the adhesive, and protective gloves should be worn while doing so. Solvent-based cleaners and soft cloths can help clean off the adhesive from the car.
Plastic putty knives and plastic razors can also scrape away any remaining adhesive.
Finally, safety glasses, masking tape, tweezers, a tarp, and drop cloths should all be used to ensure safe and practical car wrap removal.
Heat Gun
When removing car wraps, applying heat is a necessary step. Heat guns are the most recommended tool for this purpose. They can generate temperatures up to 1300°F, which makes them ideal for loosening adhesive bonds and softening the vinyl material of car wraps so they can be easily removed. They must be used cautiously to avoid any potential accidents or damage.
It’s important to note that due to their temperature output, heat guns should be used at least 12 inches away from the surface being heated; this ensures proper heat safety while also making sure you apply enough heat to remove the wrap effectively.
Additionally, keep in mind constant movement. At the same time, heating is vital as staying too long may cause permanent damage to surfaces such as paintwork or glass if not done correctly.
When choosing tools for car wrap removal, make sure a quality heat gun is at the top of your list.
Razor Blades
When it comes to removing car wraps, many people assume that a razor blade is the only tool needed. However, this couldn’t be further from the truth, as safe handling and good cleaning tips must always be considered when using one of these tools. Razor blades can be incredibly sharp, so they should never be used without protective gloves to avoid serious injury.
Additionally, dirt buildup on the surface of any wrap being removed can potentially scratch or damage paintwork, glass, etc., so clean them regularly with a quality microfiber cloth or brush before use.
If handled correctly and safely through regular maintenance, razor blades are an effective removal tool for car wraps; however, caution must still be taken at every step of the process, regardless.
With that said, their convenience makes them an attractive option for those looking to quickly remove their wrap without having to invest in additional equipment like heat guns.
Adhesive Remover
Adhesive remover is another key tool when removing car wraps, as it can help dissolve the bond between adhesives and surfaces. This makes it an excellent option for protecting paintwork, especially if you don’t want to use razor blades or other more abrasive tools that could cause damage.
However, it is essential to note that not all adhesive removers are created equal, so take the time to research before making any purchase decisions.
An adhesive remover may be one of the best ways to remove car wraps safely. Ensure that any surface treated with an adhesive remover is thoroughly cleaned beforehand, as dirt buildup will reduce its efficacy significantly. While also preserving underlying surfaces such as paintwork and glass.
Removing The Wrap From The Exterior
After pre-inspection and selecting the appropriate tools, it’s time to eliminate the car wrap from its exterior. The process can be lengthy and laborious, but with patience and care, you’ll finish it quickly.
The initial step is to use a heat gun or hairdryer on a low setting for one section of the car at a time. It should be held 8 – 10 inches away from the surface area requiring unwrapping, and moving in a slow circular motion to evenly distribute heat to avoid damage. This will loosen the adhesive of the wrap, simplifying removal.
Once this is done, gently scrape off small portions of the wrap using a scraper tool or your fingers until nothing remains. If any residue remains afterward, wipe it away with an alcohol solution before applying wax polish on top for protection against corrosion and dirt buildup. Be sure to check underneath layers if necessary, as some wraps consist of multiple vinyl sheets beneath each other.
Removing the Wrap from Windows and Mirrors
The first step in removing window wrap is to ensure that the surface is clean and dry to prevent the adhesive from causing any damage to the window. To remove the mirror wrap, gently peel it off in a corner and then gradually work around the mirror.
Heat can soften the adhesive, facilitating easier removal of the wrap. When removing the wrap, do not leave any adhesive on the window or mirror surface.
Window Wrap Removal
Eliminating window wrap is crucial for any vehicle owner who wants to ensure their car’s longevity and weatherproofing. It can be a complex task, requiring temperature control and careful application. To maximize effectiveness, it’s essential to consider all aspects involved in the removal process.
First, prepare the area by cleaning off dirt or debris on both sides of the glass with a soft cloth or sponge. You should also gently heat the surface using warm air, this helps soften the adhesive, making the job easier. Once everything has been cleaned, you can begin removing the wrap itself.
Using a sharp tool such as a razor blade scraper, carefully cut away at one corner or edge until there’s enough slack to peel back the wrap safely without damaging either side of the glass. Work slowly, taking care not to pull too hard, which could cause tearing or scratching.
Once all pieces have been removed, use a solvent-based cleaner and paper towels to remove any remaining residue before applying fresh weatherproofing sealant around each window frame to protect against future wear and tear.
Mirror Wrap Removal
Mirror wrap removal is another important process for ensuring a vehicle’s longevity and weatherproofing. With the same principles in mind, it requires a similar approach when removing window wrap from mirror frames. As with windows, clean off dirt or debris before gently heating the surface using warm air.
This will help soften the adhesive so that you can then use a sharp tool such as a razor blade scraper to carefully cut away at one corner until there’s enough slack to peel back the wrap safely without damaging either side of the glass.
It’s also beneficial to consider finding professional services specializing in these types of removals if you need more confidence tackling this job yourself. Whatever option you choose, apply fresh weatherproofing sealant around each frame once everything has been removed for added protection against wear and tear.
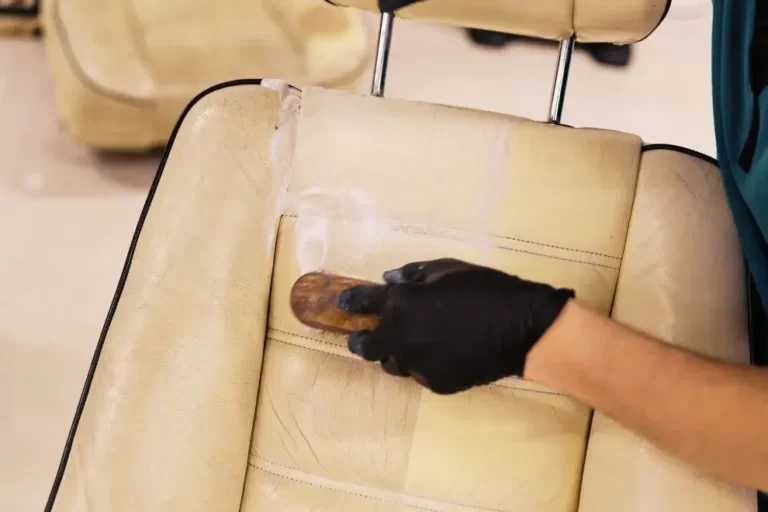
Dealing With Residue And Adhesive
Removing a car wrap may seem challenging, but it can be successful with the right tools and technique. The first step is to eliminate any residue or adhesive on the surface carefully. Dissolving glue and using solvents are two effective methods for doing this:
- Start by lightly scraping away stuck-on bits of residue with a plastic blade before applying solvents.
- Use an appropriate solvent to dissolve adhesive from the vehicle’s bodywork and the removed material.
- Utilize a clean cloth dampened with water to wipe down surfaces after applying cleaning agents, allowing them time to disintegrate stubborn residues without leaving streaks or stains behind.
Removing a car wrap can be straightforward for those who take their time and do it properly. With patience, precision, and some elbow grease, you’ll soon have your trusty ride back in its original form!
Finishing Touches For A Professional Look
Once the car wrap has been successfully removed, finishing with a few touches is essential for a professional appearance. The first step is to pre-inspect the vehicle’s surface before further treatment. This helps identify areas requiring extra attention or repair before applying new vinyl wraps.
It also allows for proper surface cleaning and preparation, ensuring maximum adhesion when installing the new wrap.
Conclusion
It is important to remember that removing a car wrap can be tricky, and it should not be rushed. Taking the time to properly prepare the vehicle for removal, selecting the right tools, removing the exterior wrap carefully, paying attention to windows and mirrors, dealing with residue and adhesive appropriately, and ensuring all finishing touches are completed ensures that no damage occurs during the process. With patience and carefulness, anyone can successfully remove their car wrap.
Frequently Asked Questions
Q: What is a car wrap?
A: A car wrap is a vinyl overlay applied to a vehicle’s surface for decorative or marketing purposes.
Q: Do I need to remove my car wrap?
A: Yes, car wraps typically have a lifespan of 5-7 years and may need to be removed if they are worn out or if you want to change the design.
Q: How do I remove a car wrap?
A: You can remove a car wrap using a heat source to loosen the adhesive, then carefully peel the vinyl off the vehicle’s surface.
Q: What tools do I need to remove a car wrap?
A: You will need a heat gun or torch, a scraper or plastic card to lift the edges of the vinyl, and a spray bottle filled with water or a solvent designed to remove adhesive residue.
Q: Is it difficult to remove a car wrap?
A: It can be challenging to remove a car wrap, especially if the vinyl is old or has been exposed to harsh environmental conditions that have caused it to degrade.
Q: How do I remove adhesive residue from my car after removing the vinyl wrap?
A: You can remove adhesive residue by using a solvent designed to dissolve and remove the glue, or by using a plastic card or scraper to gently scrape the residue away from the surface of the vehicle.
Q: Can I reuse my vinyl car wrap after removing it?
A: Reusing a vinyl car wrap after removing it is generally not recommended, as the adhesive may have degraded or lost its grip.
Q: Can I remove a car wrap by pulling it off?
A: Removing a car wrap by pulling it off is not recommended, as this can cause the vinyl to tear or break and make it more difficult to remove.
Q: Is it easy to remove a vinyl car wrap?
A: It depends on the age and condition of the wrap, as well as the skill and experience of the person attempting to remove it. With the proper tools and techniques, removing a vinyl car wrap can be relatively easy.
Q: How do I prevent damage to the surface of my car when removing a car wrap?
A: To prevent damage to the surface of your car, you should heat the vinyl evenly and be careful not to pull or scrape too hard along the edges of the vinyl. It may also be helpful to use a protective barrier, such as a soft cloth or piece of cardboard, between the vinyl and the surface of your car.